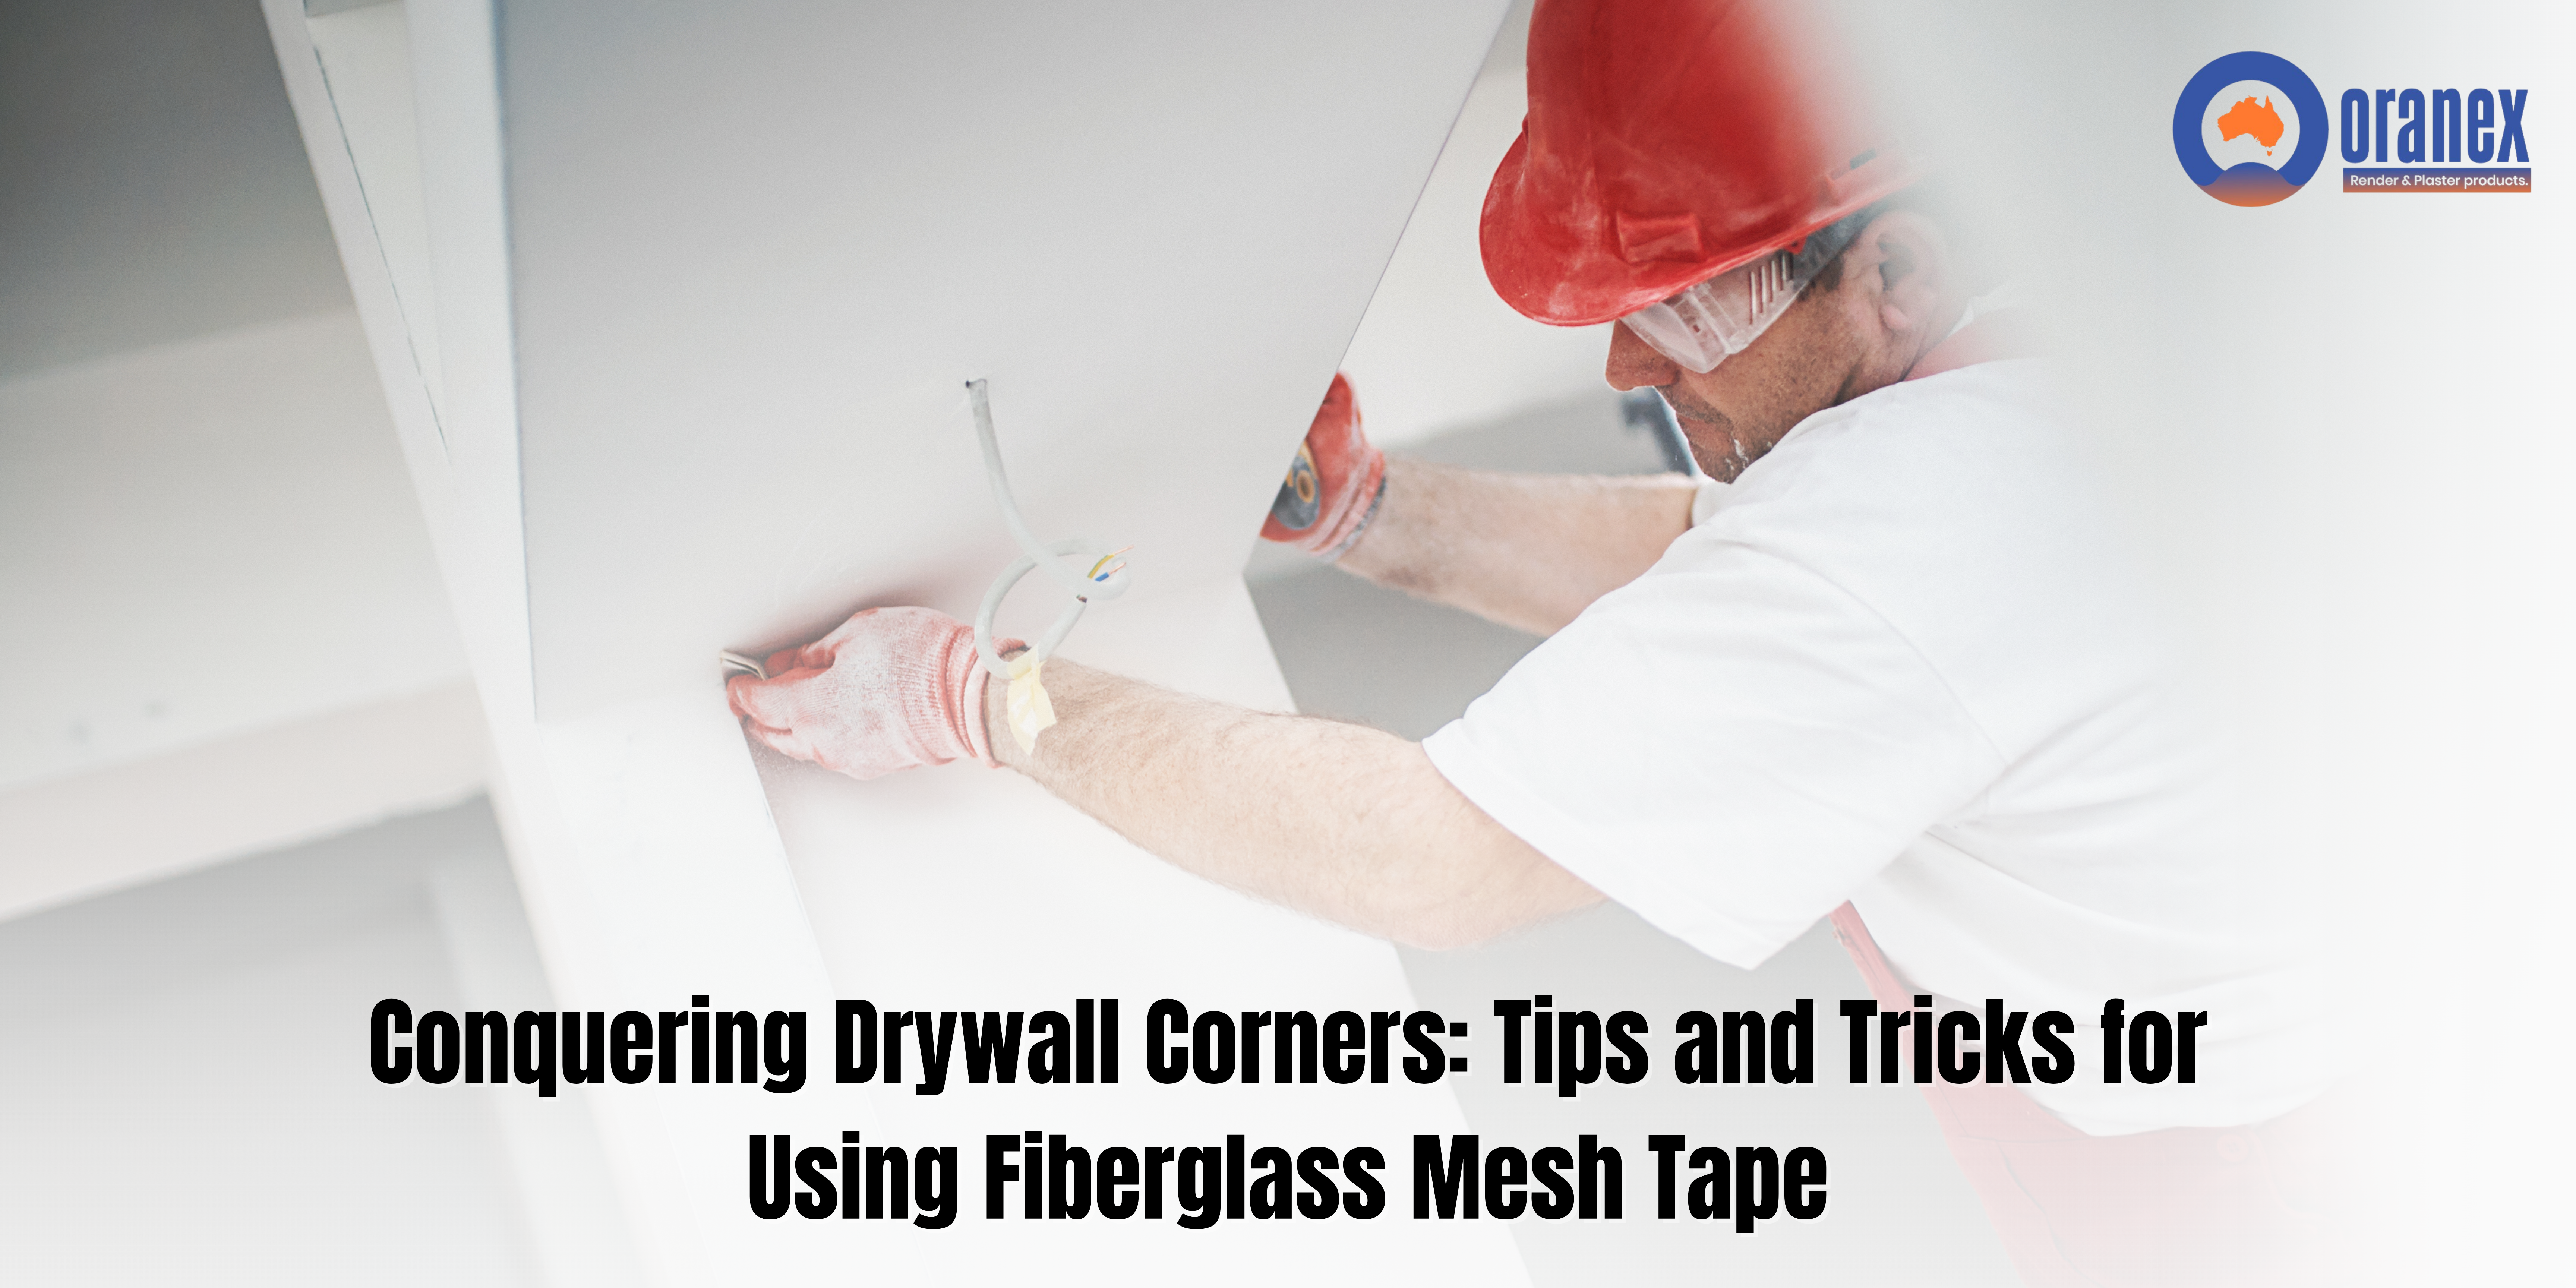
Ah, drywall corners. Those seemingly innocuous angles can quickly become the bane of a DIYer’s existence. Uneven surfaces, pesky cracks, and the ever-present threat of bubbling – it’s enough to make anyone want to run for the hills (or call in a professional). But fear not, intrepid wall warriors! With the right technique and a little help from your friendly neighborhood fiberglass wall mesh, you can conquer those corners and achieve a professional-looking finish that will have your guests singing your praises.
Why Fiberglass Wall Mesh?
Fiberglass wall mesh, also known as joint tape or drywall tape, is your secret weapon in the battle against imperfect corners. This thin, yet strong, mesh acts as a reinforcement layer, preventing cracks from forming and ensuring a smooth, seamless joint. It’s particularly adept at handling those tricky inside corners, where drywall panels meet at a 90-degree angle.
Embrace the Mesh:
Embrace the Mesh: Fiberglass Wall Mesh as Your Corner Ally
Conquering drywall corners isn’t just about mastering technique – it’s about having the right tools in your arsenal. Enter fiberglass wall mesh, your secret weapon for achieving seamless, crack-free transitions. This lightweight yet remarkably strong material acts as an internal reinforcement, preventing cracks from forming and spreading.
Think of it as an invisible shield that binds the joint together, ensuring your corner repairs stay strong and beautiful for years to come. But the benefits of fiberglass wall mesh extend far beyond mere crack prevention:
Enhanced Durability:
Mesh adds an extra layer of strength and stability to your repairs, especially crucial in high-traffic areas or where movement is expected.Reduced Risk of Shrinkage:
Fiberglass mesh helps minimize shrinkage cracks that can occur as drywall mud dries, leading to a smoother, more professional finish.Improved Bonding:
The mesh creates a better mechanical bond between the joint compound and the surrounding drywall, preventing delamination and ensuring long-lasting results.Crack Control:
For larger cracks or problematic areas, fiberglass mesh provides a much-needed layer of reinforcement, preventing the crack from reopening and marring your finished surface.
Using fiberglass wall mesh is simple and requires minimal additional effort. Simply embed it into the joint compound while applying the first coat, ensuring it overlaps onto both sides of the corner. This creates a reinforced structure that effectively holds everything together.
So, the next time you tackle those tricky drywall corners, embrace the mesh. It’s a small investment that yields big results, ensuring your repairs are not only beautiful but also built to last. Remember, a strong foundation starts with the right materials, and fiberglass wall mesh is your key to conquering those corners like a pro.
Size Up the Situation:
Size Up the Situation: Fiberglass Wall Mesh for Conquering Drywall Corners
Drywall corners are notorious weak spots, prone to cracks and damage throughout a home’s life. Fiberglass wall mesh emerges as a powerful ally in this battle, but before conquering those corners, it’s crucial to size up the situation. Here’s how:
Assess the Damage:
Are you dealing with preventative reinforcement on new drywall or crack repair on existing corners? New drywall might require a lightweight mesh, while older cracks might benefit from a heavier weave for added stability.Identify the Culprit:
Understand the cause of the cracks. Settling foundation, moisture issues, or improper installation can impact your repair strategy and the type of fiberglass mesh needed.Measure and Prepare:
Carefully measure the affected corners and surrounding areas to determine the amount of mesh required. Ensure you have the necessary tools and materials, like joint compound, sandpaper, and applicators.Consider Adhesive Options:
Choose between self-adhesive mesh for convenience or traditional non-adhesive mesh for more control over placement and joint compound thickness.Plan the Application:
Visualize the reinforcement pattern for each corner, considering overlaps and transitions to flat surfaces. This will help you optimize mesh usage and ensure a seamless finish.
By thoroughly sizing up the situation with fiberglass wall mesh in mind, you’ll be well-equipped to approach those drywall corners with confidence and create a lasting, professional-looking repair. Remember, preparation is key to conquering those pesky corners and achieving a smooth, crack-free finish.
Prep is Key:
Prep is Key: Laying the Foundation for Flawless Fiberglass Mesh Tape Application
When it comes to achieving seamless, professional-looking drywall corners, meticulous preparation is your secret weapon. Before you even think about reaching for the fiberglass mesh tape, take the time to ensure your surfaces are primed for success. This crucial step sets the stage for optimal adhesion, a smooth application process, and ultimately, a flawless finish that will leave you feeling proud.
Here’s why prioritizing prep work is essential for fiberglass wall mesh success:
Solid Foundation:
A clean, dry, and stable surface is paramount. Address any loose plaster, crumbling drywall, or unevenness before applying the tape. Sand down any imperfections and ensure the corner is free of dust, dirt, or grease. Remember, the tape is only as strong as the surface it adheres to.Moisture Control:
Excess moisture can wreak havoc on your fiberglass mesh application. Check for leaks or sources of dampness and address them promptly. Allow ample drying time before proceeding to prevent the tape from warping or bubbling.Sealing the Deal:
For optimal results, consider applying a thin layer of joint compound or drywall primer to the corner before using the mesh tape. This creates a uniform base, fills in minor imperfections, and promotes better adhesion.
By diligently following these prep steps, you’re essentially creating the perfect canvas for your fiberglass mesh tape to work its magic. Remember, an ounce of prevention (in this case, thorough preparation) is worth a pound of cure (fixing botched corners later). So, take the time to prep right, and you’ll be well on your way to conquering those drywall corners like a pro!
Additional Tips:
- Use high-quality fiberglass mesh tape specifically designed for drywall applications.
- Cut the tape to the appropriate length to avoid unnecessary overlap or waste.
- Apply the tape evenly and press firmly into the joint compound, ensuring no air bubbles are trapped.
- Use a wide taping knife to smooth out the tape and remove any excess joint compound.
- Allow the joint compound to dry completely before sanding and applying additional coats.
By following these comprehensive tips and tricks, you’ll be well-equipped to achieve flawless drywall corners that are both strong and aesthetically pleasing.
Apply with Confidence:
Apply with Confidence: Master Drywall Corners with Fiberglass Wall Mesh
Fiberglass wall mesh isn’t just for pros! Conquering those tricky drywall corners is easier than you think, and this magic material plays a starring role. Unlike its paper counterpart, fiberglass wall mesh boasts incredible strength and flexibility, making it the weapon of choice for tackling even the most stubborn seams. Forget pesky cracks and bulges – here’s how to apply fiberglass wall mesh with confidence:
Embrace the Sticky Stuff:
Unlike paper tape, fiberglass mesh doesn’t readily absorb joint compounds. The secret lies in using the right joint compound specifically formulated for fiberglass mesh. These compounds contain adhesives that create a strong bond and prevent the mesh from bubbling or separating.
Prepping is Key:
Before applying the mesh, ensure your corner is clean, free of debris, and properly taped with a joint compound to create a smooth base. This helps the mesh adhere evenly and prevents bumps.
Master the Fold:
Fiberglass mesh doesn’t bend like paper, so folding at corners requires a different approach. Instead of sharp creases, create soft folds by gently guiding the mesh into the corner. This ensures the mesh conforms to the angle without bunching or tearing.
Apply Like a Pro:
Spread a thin layer of joint compound over the corner. Gently embed the mesh, pressing it firmly into the compound, especially along the folds. Avoid stretching or pulling the mesh, as this can weaken its structure.
Think in Layers:
Don’t try to achieve a perfect finish in one go. Apply multiple thin coats of joint compound, allowing each layer to dry completely before sanding lightly. This prevents cracking and ensures a smooth, seamless finish.
Embrace the Grit:
Sanding is your friend! After each coat of joint compound dries, use fine-grit sandpaper to smooth out any imperfections and ensure the mesh is fully embedded. This meticulous approach leads to professional-looking results.
With these tips and the power of fiberglass wall mesh, you can tackle those drywall corners with confidence. Remember, practice makes perfect, so grab your tools and get ready to transform your space with flawless, crack-free corners!
The Art of Embedding:
Mastering Drywall Corners with the Magic of Fiberglass Wall Mesh: An In-Depth Look
In “The Art of Embedding,” fiberglass wall mesh emerges as a true hero for conquering tricky drywall corners. Forget unsightly cracks and uneven edges – this unsung champion adds strength and stability, paving the way for flawless finishes. Here’s how it works its magic:
Strength in Numbers:
Fiberglass, woven into a fine mesh, acts as a reinforcing layer embedded within the joint compound. Think of it as microscopic muscles holding everything together. This added reinforcement prevents cracks from forming due to shrinkage or movement, especially where corners are most vulnerable.
Crack Prevention Powerhouse:
By bridging gaps and creating a unified surface, fiberglass mesh effectively prevents cracks from appearing at the seams. Its flexible nature allows it to conform perfectly to even the tightest angles, ensuring seamless integration with the drywall.
Smooth Operator:
Fiberglass mesh acts as a smoothing agent, preventing the joint compound from bunching or sagging at corners. This translates to a visibly smoother and more professional-looking finish, free from unsightly bumps and imperfections.
Beyond the Basics:
While corner reinforcement is its primary function, fiberglass mesh offers additional benefits. It improves the overall adhesion of the joint compound, reducing the risk of peeling or flaking. Additionally, it enhances the waterproofing capabilities of the finished surface, providing an extra layer of protection against moisture damage.
The Artful Application:
Embedding fiberglass mesh requires a touch of finesse, but following the right technique ensures optimal results. Apply a thin layer of joint compound over the corner, then gently press the mesh into the wet compound, ensuring complete coverage. Smooth out any air bubbles and apply another layer of compound to fully embed the mesh. Let it dry completely before sanding and applying subsequent finishing coats.
By embracing the power of fiberglass wall mesh, you can transform your drywall corners from potential weak spots into areas of strength and beauty. So, the next time you tackle a drywall project, remember this trusty ally and experience the “art of embedding” for yourself!
Embrace the Second Coat:
Embrace the Second Coat: Why Fiberglass Wall Mesh is Your Corner-Conquering Ally
Fiberglass wall mesh isn’t just a one-and-done solution for achieving smooth, seamless drywall corners. It’s your partner in crime, your secret weapon against cracks and imperfections. While applying a single coat might seem sufficient, embracing the second coat with fiberglass mesh is the key to truly conquering those tricky corner angles. Here’s why:
Enhanced Strength and Protection:
The first coat embeds the mesh, providing initial reinforcement. However, a second coat strengthens this bond further, creating a robust barrier against future impacts and settling. Think of it as adding an extra layer of armor to your drywall fortress.Smoother Finish:
The first coat might not fully conceal the mesh, leaving slight ridges or bumps. A second coat acts as a smoothing agent, filling in any gaps and ensuring a flawlessly even surface. This is especially crucial for achieving that professional, paint-ready finish.Reduced Cracking:
Drywall corners are prone to cracking due to stress and movement. The second coat, infused with the mesh, creates a more flexible and resilient structure. This reduces the risk of cracks appearing, saving you time and frustration down the line.Confidence and Peace of Mind:
Applying that second coat might seem like extra effort, but it’s an investment in confidence and peace of mind. Knowing your corners are properly reinforced and protected allows you to focus on other aspects of your project without worrying about future repairs.
Remember, fiberglass wall mesh is your ally, not a shortcut. Embrace the second coat and unlock its full potential for conquering those drywall corners like a pro.
Sanding Nirvana:
Sanding Nirvana: Achieving Flawless Finishes with Fiberglass Wall Mesh
When mastering drywall corners, fiberglass wall mesh becomes your secret weapon. But let’s face it, even with perfect application, sanding can still feel like an eternity. Here’s how achieving “Sanding Nirvana” becomes a reality with the help of fiberglass wall mesh:
Crack Prevention, Crack-Free Sanding:
The primary benefit of fiberglass mesh is its ability to prevent cracks. This translates directly to less sanding! By reinforcing the joint between drywall panels, the mesh absorbs movement and stress, preventing hairline cracks that would otherwise require tedious filling and sanding.Thinner Coats, Less Sanding:
Fiberglass mesh allows for thinner joint compound application. Compared to thick layers needed to hide imperfections and potential cracks without mesh, a thin, reinforced layer with mesh sand is much faster and easier. Imagine, less material removal translates to less effort and smoother results.Consistent Texture, Smoother Sanding:
Fiberglass mesh creates a uniform base for the joint compound, eliminating uneven areas that require extensive sanding. This consistency makes sanding a more predictable and manageable experience, requiring less pressure and achieving a uniform, professional finish.Fewer Sanding Grits, Faster Progress:
With a strong, reinforced base and a smooth initial texture, you can often skip rougher sanding grits, moving directly to finer grits for polishing. This reduces overall sanding time and effort, getting you to the “Nirvana” of a perfectly smooth finish quicker.Long-Term Smoothness, Less Future Sanding:
By preventing cracks and creating a strong, stable base, fiberglass mesh ensures long-term smoothness. This means less chance of cracks reappearing down the line, requiring additional filling and sanding. Invest in proper reinforcement now and enjoy your flawless finish for years to come.
Remember, “Sanding Nirvana” is achievable with the right tools and techniques. Fiberglass wall mesh is your key to reducing sanding time, effort, and frustration, leaving you with a professional, crack-free finish that truly embodies the term. So, conquer those drywall corners and embrace the joy of effortless sanding!
Corner Reinforcement (Optional):
Conquering Drywall Corners: Corner Reinforcement with Fiberglass Mesh Tape
When it comes to achieving seamless, professional-looking drywall corners, fiberglass wall mesh is your secret weapon. This versatile material provides exceptional reinforcement, preventing cracks and ensuring long-lasting, beautiful results. Here’s how to effectively use fiberglass mesh tape for corner reinforcement:
Choosing the Right Fiberglass Mesh Tape:
Width:
Select a mesh tape that’s slightly wider than the corner itself, typically 2-3 inches, to provide ample coverage and prevent edges from showing through.Adhesive:
Opt for self-adhesive mesh tape for a convenient and time-saving application. If using non-adhesive tape, choose a high-quality drywall joint compound for secure bonding.Mesh Weight:
Heavier mesh (45g/m² or higher) offers superior strength and crack prevention, especially for areas prone to movement or impact. For standard corners, a lighter mesh (35g/m²) might suffice.
Reinforcing Your Corners:
Prepare the Corner:
Ensure the corner is clean and free of dust, debris, and unevenness. Apply a thin coat of drywall joint compound to fill any gaps or imperfections. Allow it to dry completely.Apply the Fiberglass Mesh Tape:
- For self-adhesive mesh, peel off the backing paper and carefully position the tape along the corner, ensuring it’s centered and straight. Press firmly to form a good bond.
- For non-adhesive mesh, apply a thin layer of drywall joint compound over the corner. Unroll the mesh tape and embed it gently into the compound, smoothing out any air bubbles or wrinkles.
Embed the Mesh:
Using a taping knife, gently press the mesh tape into the joint compound, ensuring it’s fully covered and adheres seamlessly. Apply additional compound if needed to create a smooth, even surface.Reinforce Additional Coats:
Apply two or three more thin coats of drywall joint compound over the embedded mesh, allowing each coat to dry completely before proceeding. Sand lightly between coats for a smooth finish.Finishing Touches:
Once the final coat is dry, sand the area until perfectly smooth. Apply corner beading (optional) for added protection and a crisp aesthetic.
Bonus Tips:
- Use a straightedge or level to ensure the corner is perfectly straight during application.
- For extra reinforcement, consider using fiberglass joint tape in conjunction with the mesh tape, especially for high-stress areas.
- If you’re using non-adhesive mesh, a roller tool can help smooth out the compound and ensure proper mesh embedment.
By following these steps and choosing the right fiberglass mesh tape, you can achieve perfectly reinforced drywall corners that are resistant to cracks, chips, and dents, contributing to a flawless and long-lasting finish for your project.
Patience is a Virtue:
Patience is a Virtue: Mastering Fiberglass Mesh Tape for Perfect Drywall Corners
When tackling drywall corners, especially with the reinforcement of fiberglass mesh tape, patience is your golden ticket to achieving a smooth, seamless finish. Rushing through this step can lead to imperfections, air bubbles, and visible tape lines, negating all your hard work. Here’s why embracing patience is key:
Precise Application:
Fiberglass mesh tape needs to be carefully placed and pressed into the corner crease to ensure proper adhesion. Rushing can lead to misalignment, air gaps, and uneven tape application, resulting in a bumpy, unprofessional finish. Take your time to center the tape and use a smoothing tool to gently press it into the corner, ensuring it makes complete contact with the drywall surface.Smooth Out the Bubbles:
Applying the tape without patience can trap air bubbles, creating unsightly bumps under the joint compound. Work meticulously, using a taping knife or your fingers to gently press out any air pockets as you apply the tape. Remember, slow and steady wins the race here – rushing will only increase the chances of trapping bubbles.Embrace Thin Coats:
When applying joint compound over the fiberglass mesh, resist the urge to pile it on thick. Instead, apply multiple thin coats, allowing each layer to dry completely before adding the next. This prevents cracking, shrinkage, and the tape telegraphing through the compound, ultimately leading to a flawless, professional-looking finish.Sanding Nirvana:
Patience is your friend during sanding as well. Sanding too aggressively can damage the tape or gouge the drywall. Use light, even strokes with fine-grit sandpaper, gradually progressing to finer grits as you achieve a smooth, seamless surface. Remember, sanding is a marathon, not a sprint, so take your time and enjoy the process of transforming your rough corners into a thing of beauty.
Remember:
While conquering drywall corners demands meticulous attention to detail, it’s important to enjoy the journey. By embracing patience and focusing on each step with care, you’ll be rewarded with flawless corners that showcase your DIY mastery. So, put on some calming music, grab your tools, and conquer those corners with patience as your guide!
Celebrate Your Success!
With careful application and a little patience, you’ve conquered those pesky drywall corners. Stand back and admire your handiwork – you’ve achieved a professional-looking finish, all thanks to the power of fiberglass wall mesh!
Bonus Tip: For a truly seamless finish, use a setting compound specifically designed for corners. This type of compound dries harder and is less prone to cracking, ensuring your corners stay sharp and flawless for years to come.
Remember: When it comes to drywall corners, fiberglass wall mesh is your go-to ally. By following these tips and tricks, you’ll be well on your way to achieving smooth, flawless results that would make any professional proud. So, grab your mesh tape, channel your inner pro, and get ready to conquer those corners!
